Friday

City_viewSo very very tired. I guess we’ve been walking 8-10 miles a day and we’re hurting! Everywhere you go is by subway or train and all the stations are well below the city so you have to walk up and down stairs all day to get in/out of the stations. Our legs hurt in all kinds of ways. Seeing an escalator is a blessing. The stations are incredibly busy, the busiest in the world, and it’s fascinating to watch the people come and go (and learn not to get flattened). You figure out which line, which station, how much, buy a ticket, put the ticket in the machine, keep the ticket handy because you need it when you get out, and go go go.

This morning we went to the Tokyo Metropolitan Government Towers. It’s a twin set of towers with observatories at the top of each tower about 45 stories up. Here a view of the city from one of them. We were hoping to see Mount Fuji (60 miles away) but the weather has to be just right for that and today it was clear but hazy.

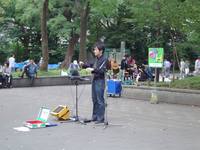
TheraminWe also went to Ueno, via a marketplace where they sell lots of American goods. (The Japanese are crazy about Mickey Mouse, Sesame Street, Levis and Winnie the Pooh.) In Ueno we went to a park where there were different artists set up along a long promenade. Some were singers, one was a comedian, others were musicians. We turned a corner and a young man was set up playing a theremin! That was a weird thing to come across. We also saw people feeding tofu to a feral cat colony.

We went to a small museum that houses examples of how people in Japan lived in the last eighty years or so before WWII and the big earthquake of 1923. There were replicas of houses and businesses and the materials that are in them, beds, fire places, clothes, etc.

We also went to the National Museum, which houses the historical arts of Japan going back to 10,000 BC. Scrolls, armored clothing, weaponry, embroidery, painted screens, lacquer ware, etc.

Here are some of the goofy signs we’ve seen so far.

A doctor’s office? Doctor_sign

Alien_signI have no idea….

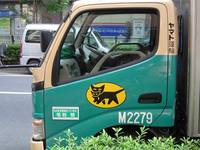
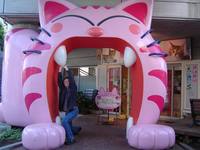
My favorite, a parcel delivery service:

Parcel_cat

The Japanese food pyramid: Food_pyramid_1

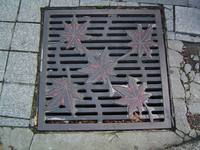
Oh, and best manhole covers EVManhole1ER. Manhole3Manhole2

Thursday

Subway_scene

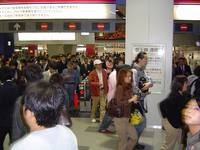
Hi, Sharon here. It’s very clean here. There are men in uniforms and white gloves sweeping and wiping down planters and sidewalks. Oddly, there are no trashcans anywhere. If you have something to throw away you just carry it until you can find one (and then the complex sorting of recyclables begins). We get back to the hotel at the end of the day loaded down with empty bottles and other trash. The sidewalks are crowded with people walking, people on bikes and delivery people pushing carts. I haven’t been jostled once. Somehow everybody manages to scoot around each other. Here’s a picture of one of the subway exits with loads of people coming home from work. When people get on the trains they pop open their cell phones (to quietly interact with them, no conversations at all) or instantly fall asleep.

Asakusa_mkt

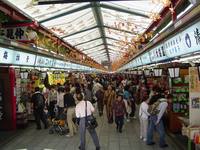
In the morning we went to a large temple in Asakusa. It’s very touristy and that includes Japanese tourists from all over Japan. They were all very excited to be there and there was much picture taking. There’s a giant market with all kinds of goods. There aren’t that many Western/European tourists in general.

The only encounter we’ve had with an American though was really special. She came up to us while were looking at a map (about 20% of our days are spent looking at maps — Chris stops to study every single one). She was in her sixties and needed some general directions. Turned out she was from Georgia, had lived in Atlanta for 30 years, had moved from Augusta to Arizona. She had the gentle Georgia drawl though and we spotted it immediately. She’s in Tokyo for six months undergoing an alternative therapy for breast cancer. She’s here alone (her husband is in Arizona), has had recurrent BC since 1997 and has never had chemo or radiation. We talked for long time and she’s very ingrained in the Atlanta art/teaching scene. She has a friend who is having her baby at Piedmont Hospital and I’ll try to find her when I return.

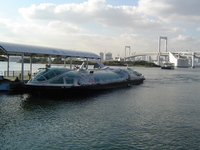
Dsc01167We walked from there over to the river boat to take a boat ride down to Odaiba. We rode on this bizarre river boat which looks like the boat from 20,000 Leagues (that’s the “Rainbow Bridge” in the background). The boat went down the Sumida River, which is the most central of several rivers that course lazily through Tokyo. We got to see the back of the Tsukiji fish market, where the boats pull up and unload their catch, I guess. Another cruise available was the “Happy Dog Cruise”, where once again unsuspecting dogs are sequestered to be petted and admired by the pet-starved Japanese. The boat’s destination was Odaiba, which is a manmade island in Tokyo bay built up with underattended entertainment destinations and corporate high rises. Think city planners run amok.

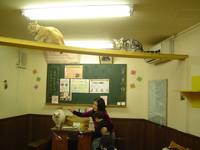
Cats_living_boy_1I have to say, I’m pretty obsessed with the concept of people craving the interaction with animals. It’s so charming and sad all at once. Thankfully, Chris allowed himself to be dragged to yet another cat demo store there [Chris adds: when I can’t stand it anymore, I just go sit outside and continue reading my book about Buddhism; a great contrast, methinks]. It’s called Cats Livin’ and it’s like a little house with rooms, like the living room, the bathroom and the kitchen that the cats wander around in, trying to avoid the people who have paid to come pet and play with them.

This picture was taken right before my only (so far) injury: rope burn from the leash when the cat leapt down.

Cats_livin_sl

There was also the Sega Joypolis which is a gigantic game center (which we avoided), a gigantic Toyota carporn showroom, and the world’s biggest Ferris wheel (so they claim, true only if you cover your ears starting in 1999). Here we are in a car waaaaay up.

Ferris_wheel

Last night we ate in another alley area, again with tiny seating about 5-6 per restaurant. We had yakatori – grilled chicken, pork, bell pepper, leek, garlic and beer and sake.

Simmer down, you crazy people, Harajuku is coming Sunday. Note to Mark and Lisa: the gashepon are crazy good and the meatballs are HOT.

Wednesday – Tama

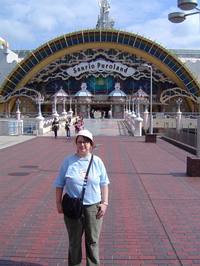
Hk_kids_1We started with a breakfast of eggs, salad, big toast and coffee/tea. We headed to the Tama Region which is about 40 miles to the West of Tokyo. It took about 40 minutes by subway/trains. Purloand is a big park in Tama City Center — all the signs there say it’s “Hello Kitty’s Town!”. Purloand is all inside a huge building with 4 stories. Hk_slIt’s much like Disney World: anamatronics, dancing characters accosting children, attendants with smile holders, and LOTS of gift shops all through it.

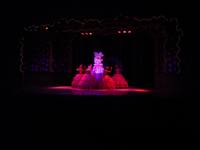
We saw a show in a theater that held about 200 very quiet adultsHk_show1_1 and children. The show involved some plot about HK being sad and going off to a magical land with fairies. The sets were ornate and the stage revolved. The costumes were either people in fluffy HK gear or people in fairy suits. It was the best singing, dancing, people in costumes show I ever saw. [Chris adds: it was deafening — children were crying; I think they had it so loud both to stun the kids into silence and to drown out the ones who’d snapped].

Hk_boat_pic_1

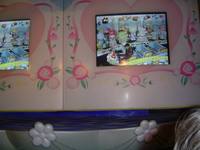
There is a boat ride that goes through and around the entire building. This is a picture of the monitor where they take your picture as you pass by a camera. We didn’t know this or we would have been acting like fools.

I must say the gift shops were overwhelming, even for me. I saw HK computers, dehumidifiers, ipods, food, clothes, and I’m now content. OH, and I got plenty of loot. Uncle Chris got Bridget some really cute clothes. While I was in the gift shop Chris was figuring out where to go next (as is the case during much of this trip).

Tama_shrine

We took a monorail from Tama a couple towns over to a Buddhist temple (Takahata Fudoson). At this point we were in the hills that rim the Tokyo sprawl, but still it was completely urbanized — just with some green hills poking out of the asphalt soup.

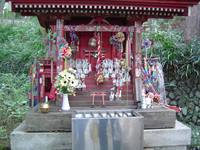
Then we went even further out, to the edge of the Tama mountain region. We took a cable car halfway up Mt. Takao and then walked up trails with temple and Buddist images all along. It was dusk and cool and at the top of the trail was a large shrine with more carvings.

NightWhen we got home (after multiple trains) we stopped at an Italian restaurant in Shinjuku — some franchise chain not unlike a Denny’s, except for the weird remote control button at your table that you pushed to hail the waitress (in about 2.5 seconds, not kidding). It was packed with kids doing their homework together and had feel like a maltshop; very sweet.

Here’s a pic of Shinjuku at night.

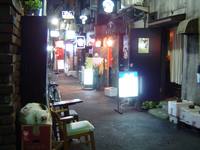
The night before, we went to Golden Gai, a strip of tiny bars in alleyways about 4 feet wide. There were probably about 8 alleyways, each with maybe 20 bars on each side. The bars are literally tiny; about 10 feet x 5 feet including a bar the owner stands behind and a bathroom. Only 4-5 people can be in one at a time. Each bar identifies itself by posting different pictures or “types” of images on the front door. We passed by one with a Ramones poster and went into one that was run by a young girl. It was pale blue inside and had an Audrey Hepburn picture on the front. We each had a Guinness and it cost $18. A piece. Here’s a section of Golden Gai. Note the calico cat asleep on the boxes in front. It was the pet of the owner of that bar, I guess; it had a collar.

Golden_gai

Tuesday?

Hi! We’re having a great time. Very tired, over stimulated and getting used to the subways. Overall, the country is very clean, safe and friendly. We can get coffee, beer or whiskey at any time from vending machines! Brilliant.

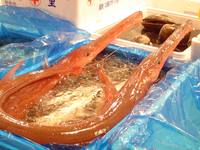
Today was AMAZING. Chris insisted we get up before the crack of dawn and go to the Fish Market. [Chris adds: up at 3:30am, at fish market at 5:30; Japan doesn’t do daylight saving time so the sky was brightening by 6am]. The Tsukiji Fish Market is a colossal wholesale market where the fish are brought in from the ocean directly to the docks and unloaded. Long_fish_1

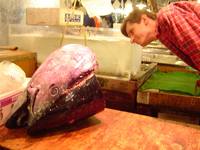
It’s row after row of vendors selling all kinds of creatures just dragged in from the sea, fresh and frozen. Much of it I couldn’t recognize. There’s also a vegetable market. The restaurants come here to get their ingredients for the day. A tuna auction is held with the frozen tuna right off the boats. The fish have an end flap opened up so the vendors can check the fattiness and freshness of the fish (with a flashlight!) The red paint is used to mark the fish purchase by painting right on the fish.Tuna_auction_6

I had no idea tuna was so huge.Bw_tuna_1

After all the fish is unpacked this is what is left — a mountain of styrofoam crates. They recycle it somehow, as they do everything. Again, small country, lots of people. They figure out a way to make it fit.Styrofoam_1

After that we went to a Kabuki theater and saw an act of a play. It was beautiful and much more tolerable than I expected. I’ll let the boy give you the details on that. [the boy adds: much like Chinese Opera, especially the music; different stage layout, more subtle choreography, huge audience (at 11am on a weekday!) occasionally shouting out the names of acting schools, or something like that. Sorry we couldn’t stay for the whole 4 hour show!]

Cat_park_2

Catpark_3THEN. We went to the Dog/Cat/Ferret park, but the ferrets weren’t there or at least no one could tell us where they were. The deal with the Dog/Cat park is that people in Tokyo don’t have enough room/money to keep pets. Most live in rented apartments and the landlord won’t let them keep them. So there are “stores” and parks where people go to pet and hang out with cats and dogs.

Catpark1_1The cats are in little individual rooms and rotated among a bigger room where people can go and pet them and play with them.

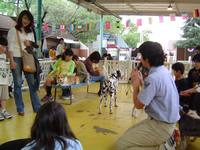
The dog park is rightDogpark1_1 next door and you can “check out” a dog and take it for a walk. You can also go in a big pen where they run around and just pet a bunch of them. It was charming and bizarre. You should have seen the gift shop! Chris wishes he hadn’t.

Tomorrow, Puroland, home of Hello Kitty. Wish Chris luck. [Chris adds: Wish me luck? Pray for my sanity! At least I might get some mountain scenery out of it, it’s in the western Tama region.]

Arrival

The boy says: 5 hours of sleep Saturday night. Up for 24 hours Sunday to Monday. Even the airport bathroom provokes culture shock. In Tokyo at last. Will absorb after sleep, beautiful sleep …

Bw_subwaymap

Bw_bk

Pic 1: pondering the Tokyo subway map; due to separate private lines, this does not actually represent the entire transit system

Pic 2: breakfast from a convenience store; guy in background may in fact NOT be homeless

The girl says: First thoughts at the airport: Wow! Cute shoes! So far we made it to the hotel and it’s even tinier than we imagined. We can hardly walk around the bed without bumping into each other. We walked a few blocks and ate dinner with minimal complications. Now we sleep and try to power up for tomorrow. VERY excited.

Tokyo Preview

OK, so suddenly everyone I know is going to know about this stupid blog. Wooooooooooo.

The Girlfriend and I are going to Tokyo for a 9 day vacation. Harajuku freaks, fish market chaos, buddhist temples and shinto shrines, train stations ad nauseum, crazy food, broken English, bewildering street plan … and let’s not forget Hello Kitty Land, shall we?

We’ll try to post here daily with reports of what we’ve been doing. But we’re going to try to NOT deal with photos because, you know, sitting in the hotel trying to get a photo posted to your blog while in the middle of freaking Tokyo Japan is just plain pathetic.

We’ll take photos, but we’ll probably upload them later, after we get back home. UPDATE: well, obviously not posting pictures was NOT an option …

How to build a stage out of shipping pallets

I just finished building a small performance stage for a local non-profit arts organization. We couldn’t afford to build the stage structure from scratch with purchased wood framing, and we had access to a whole lot of shipping pallets, so we decided to use them instead. In hindsight, I probably would try to find a way to build using standard wood framing.

Further, I’m not really sure why even I bothered to type this up. I just hate losing information … I guess I figure someone might find a use for this someday. Heck, I got thank-you emails for the (much more complex) acoustic panels page that I did a few years ago, so the least I can do is spend 30 minutes typing this up …

Step 1: Understand shipping pallet lingo

2. Inventory your pallets

Understanding pallets is important because you’re going to need to sort the pallets into various categories. Chances are good that you’re not going to have a completely uniform selection of pallets, especailly if you’re scrounging them up from somewhere.

Pallets generally come in one size: 36″ wide by 42″ long by 4.5″ tall. If you find some pallets that aren’t that width and length, set them aside for later use. The height of the pallet is the killer: they may be 4.5″ tall, 4.75″ tall, 5″ tall, who knows. There’s going to be some variation in height. Which means that you’re going to need to sort through them and lay them flat such that each layer has the same thickness pallet throughout. This is doubly true if you’re stacking them in two or more layers.

So measure all of your pallets and inventory what you’ve got. I recommend that as you measure them, you write the dimensions on the side of the pallet. This will be very useful later on when you’re puzzling together your stage.

3. Lay the pallets out

Not much to say … Lay them out and try to fit them as close together as possible. Start at the back wall (assuming you’re backing the stage up to a wall) and run them out PAST the front and side edges of the stage.

4. Trim the edges

After the pallets are laid out and fitted together as tightly as possible, mark the edges of the stage on the top layer of pallet. Get a power saw (a reciprocating saw aka “Sawzall” is ideal) and simply tear through the pallets along that line. Watch out for nails.

After cutting, you’ll need to get some stringer chunks, or 2x4s, to block up the now-fragile edges. This is a lot of work but it has to be done, otherwise the edges of your stage will be weak and those are the most important parts.

5. Run wiring

If you’re going to have power or signal wiring running under the stage, run it now before the next step. Just leave a couple feet extra hanging out.

6. Lay out plywood

You’ll want to use 3/4-inch plywood. I ended up using 1/2-inch plywood because that’s what someone had already bought, but it’s just a little bit too flexible.

Lay out the sheets, extending past the edges, nail them down, and cut off most of the excess but leave a few inches of excess overhanging the pallets. This will be cut off later.

7. Lay out the wood flooring

We were lucky in that we had a professional flooring company donate the materials and labor to surface the stage. It ended up being about a thousand dollars worth of 3/8-inch thick ash flooring. Have them run the flooring out past the pallet edge (aka “wild”).

8. Trim the edges

Mark the exact stage edge line. Get a good jigsaw with some strong, high quality smooth cutting blades and cut both the flooring and the subfloor at the same time.

9. Trim the front of the stage

The front of the stage will still be exposed, showing the pallet core. You’ll want to cover that up wtih something. In our case, the front edge was curved (i.e. round stage) so I got some wall paneling, cut it down, and installed it backwards. I intend to paint it black so that it doesn’t really matter what the back surface looks like.

10. Trim the corner edges

The edge of the stage (like a stair step edge) needs to be trimmed. I haven’t yet found a suitable edging material, because in my case it needs to be rounded.


StageUpdate 20-Mar-2006: A couple weeks ago I finally got the front edging done — it’s called “nosing” and it’s this heavy vinyl stuff that is used on stair tread edges. Worked great on the curve as long as I used A) wallboard epoxy and B) lots of little finish nails.

Eyedrum was used for a wedding last weekend and this photo was taken of the stage before the ceremony. Wow!

How to make acoustic baffles

Acoustic Baffle / Absorbent Panel Construction Procedure

See the main Eyedrum Acoustics Project page for background info.


Ingredients:

Item Purpose Price/Unit Units/Baffle Cost/Baffle Baffle cross section
3/8-inch plywood structure, improve LF absorption $12 for 4’x8′ sheet 2.04’x4′ $4.00

Baffle-sideview

(burlap not shown in photo)

Owens Corning 703 compressed fiberglass insulation, two inches thick, unfaced Acoustic absorption $0.92/sq-ft 8 sq-ft $7.36 x 2
Polyester batting, 3 ounce weight -OR- Polyester batting, bonded, 1/4-inch thick keep the fiberglass fibers from getting out $1.39/yard off 48-inch-wide roll -OR- $8.99/queen-sized sheet (90″ x 108″) 1.33 yards -OR- 20 square-feet $1.85 -OR- $3.00
Fabric cover: white burlap cosmetic cover $2.77/yard of 36-inch-wide roll 2.33 yards $6.46
Heavy duty hanging hardware $3.00?
Total $30.03

NOTES:

  • The agreed-upon configuration is shown above. See the simple cost calc spreadsheet.
  • Cost per panel drops by $6.56 if 1-inch-thick OC-703 is used — but less thickness means less absorption.
  • Cost per panel drops by $3.50 if natural (light brown) burlap is used — which is actually better due to a more “open” weave, and the natural color may blend in better with the unpainted wood joist ceiling. However, having met with the architecural consultant, she thinks white panels will look better, and effectively provide a visual “drop ceiling” in the space that we plan to use them in.
  • Hardware cost is not known yet — I’m not sure yet how I’m going to hang these. It has to be absolutely safe (we don’t want these things falling from the ceiling), but we don’t want to spend $20 per panel on hardware either. See bottom of page for more information about the hanging hardware.
  • Also need to treat burlap with fire retardant. Cost not yet known. Here’s one product. Could also get it done at a commercial cleaners.
  • Instead of burlap, if you’ve got the money, you can use real acoustic fabric such as Guilford FR 701. It costs $18 per linear yard (66″ wide), so that’s $30 per panel. Ouch. That’s too much for a DIY baffle project like this, but if you’re interested, order directly from Guilford at 1-800-544-0200.
  • The OC-703 is 55% of the cost. Since I’d be buying $500 worth of the stuff (72 panels), maybe I can get that discounted a bit.
  • Since we’re building these ourselves, there’s nothing that says we can’t build these panels to custom sizes. Specifically, I’m thinking 2’x6′ (instead of 2’x4′) because that will fit better between the HVAC duct exhausts. But that will have little to no effect on the total material cost.

Tool / Hardware List

In addition to the major items listed above, you’ll need the following:

  • drill with assortment of wood bits
  • roofing nails with “washers” — (1.75-inch long is OK, 2.00-inch is better)
  • regular scissors, measuring tape, flathead screwdriver
  • 7/16-inch wrench — box or socket
  • power stapler of some sort and staples (7/16-inch T-50 staples are ideal); need about 150 staples per panel; manual staple guns suck.
  • a hammer, preferably a small-sized one and a regular-sized one
  • hooks for the baffles (should screw to side of wood — try 3.5-inch “rope” hooks)
  • screws to attach the hooks to the plywood — 1/4″ x 1″ hex head lag screws (7/16 hex head)
  • hooks for the overhead joists (standard screw-in type)
  • chain or aircraft cable assemblies (see bottom of page for discussion of that issue)

Baffle Construction Procedure

It takes about 2 man-hours per panel to do this procedure, assuming you know what you’re doing (i.e. this isn’t your first one) and you’ve got all the tools and materials ready. More than half of that time is taken up in affixing the burlap. Due to setup time overhead, it is recommended that you build these in batches, instead of one-at-a-time to completion.

  1. Cut the plywood down to 24.5″ x 48″ panels — that’s a half-inch MORE than 24″ x 48″. This means you’ll have three per 4′ x 8′ sheet with scrap left over. The extra half inch means you’ll have a 1/4-inch extra for the top and bottom edges, which will support the baffle when resting on the ground — if the fiberglass panels have to support the weight of the panel, they are likely to shear off of the plywood (they won’t be very well attached). Also, it makes the stapling part a lot easier. The rest of this procedure sucks if you use 24″ x 48″ panels — spend the extra buck per panel for the 24.5-inches.
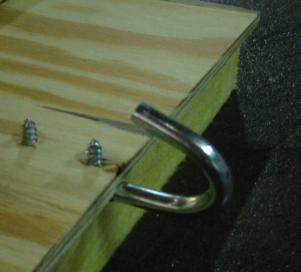
  2. Drill four 11/64-inch holes in the plywood for the two hooks. The hole pairs should be 8 inches from each side edge (32 inches apart), and the holes should be placed 7/16-inch and 1+9/16-inch from the top edge (1+1/8-inch apart). Which edge is “top” is arbitrary — pick one.
    Baffle-hook Baffle-nail
    Baffle-nail-pattern
  3. Get the hooks and remove any pricing labels from them (it’s easier to do it now than to do it later). Attach the hooks using the lag screws. Orient the hook so that it goes “up and over” the edge of the plywood and points down the “back” side. Hand tighten — don’t strip the plywood. The tips of the screws will probably poke through the back side — that’s OK, the fiberglass panel will cover that.
  4. For the next few steps, be sure to keep your hands away from your face, until you’ve wrapped the fiberglass panels in the polyester batting.
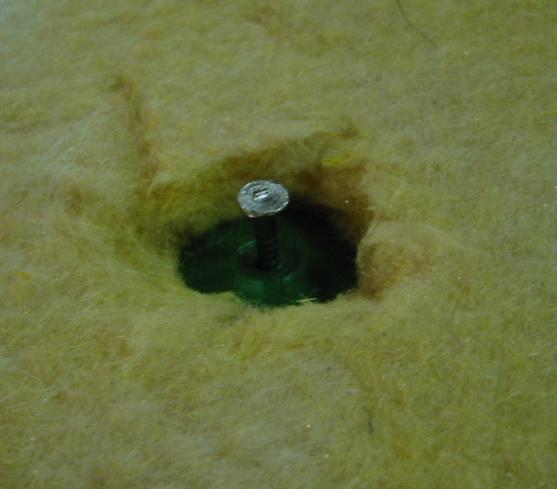
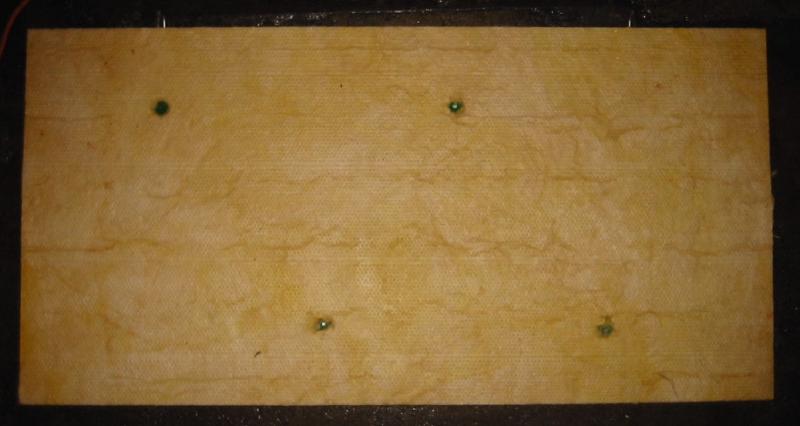
  5. Place the plywood flat on the ground with the hooks pointing up in the air — so the “back” side will be facing up. Place one of the fiberglass panels on top of it, centered on the plywood. Nail the fiberglass panel to the plywood using four roofing nails with “washers”. 2.00-inch nails are ideal, but 1.75-inch nails will do if that’s all you can find. If the nails are “too short”, help the washer push through some of the fiberglass insulation as you nail it in — push the washer edges with your fingertip; it just shears right through it. Nail in a zigzag pattern as shown at right — this ensures that the nails on the opposite sides of the panel will not collide with each other. Use a few heavy hammer blows, otherwise the nail will bend and you have to try again with a new nail. Pound each nail until it’s just barely through the board. You may have problems with this step if the plywood is warped. After each nail, make sure the fiberglass panel has not shifted.
  6. Flip the assembly over and attach the other fiberglass panel.
  7. Cut a 60-inch length of polyester batting (should be 48 inches wide) and lay it out flat on the floor. If you got the queen-sized sheet kind instead of the rolled kind, cut the sheet into three 60″x45″ pieces (with one 30″x45″ piece left over).
  8. Place batting on top of the assembly so that there is 5 inches of batting extending past the top edge of the assembly (the edge with the hooks) and a little bit extending past the two sides. Tug the batting around until it is straight and lined up with the panel. Smooth the batting against the top edge of the panel — it should stick.
    Baffle-burlap6
  9. Lift the panel by the side edges and rotate it in air so that the bottom edge goes up and over, and place the panel back down. Smooth the batting and overlap it with the other batting flap on the top edge of the panel.

    Be careful when you move the panel — PICK THE PANEL UP off the floor, rotate it in air, and place it straight down either A) flat on one of its two faces, or B) on its edge so that the plywood touches the floor and supports the weight. If you tilt the panel up off the floor, and/or lean it against a wall, the weight will be supported by the fiberglass panel, and the nails will probably pull out.

    As you do this, pay attention to whether the fiberglass panels stay nailed to the plywood. If not, then you’ll need to bash the nails in harder, or use longer nails.

  10. Trim the batting on the top and side edges. On the top edge, the two batting flaps should be completely overlapped and each should reach nearly all the way across to the far edge (~4 inches).
  11. Unroll and cut about 110 inches of the burlap. Don’t let the burlap ever get folded (e.g. at any time after cutting it at the store) — it creases easily and the creases don’t come out, like linen. Keep it rolled up, just like they had it in the store.
  12. Place the burlap on the assembly lengthwise so that there is 5 inches of burlap extending past the side edge (pick a side). Center the burlap vertically so that there is plenty of burlap (8 inches or more) extending past the top and bottom edges. If necessary, skew the burlap so that the grain of the fabric lines up with the edges of the panel.
  13. Stand the assembly up on the other side edge, bring the burlap up with it. Be careful when you do this — PICK THE PANEL UP off the floor, rotate it in air, and place it straight down on its edge so that the plywood touches the floor and supports the weight.
  14. On the edge that’s now facing up into the air. trim the burlap so the edge of the burlap is about 1 inch back from the corner of the assembly edge, or about 1 inch beyond the plywood edge.
  15. Staple the burlap to the plywood edge. Pull the burlap up gently as you do this and keep the tension equal across the edge. Try to run the grain/weave straight, too. Tap the staples in with a hammer if necessary.
  16. Pick up the panel and rotate it in mid-air so that the remaining burlap is pulled up over the other edge. Make sure the burlap weave parallels the panel edges. Trim the burlap as above.
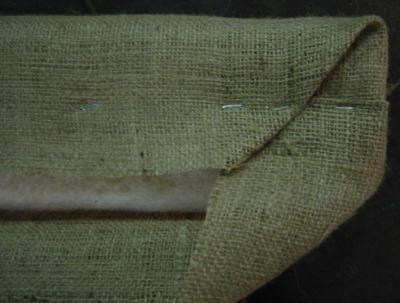
  17. FOLD THE BURLAP UNDER (about a half inch) and staple it to the plywood. Do this stapling neatly because people will be able to see it. Tap the staples in with a hammer.
  18. Now rotate the panel so that it is resting on the hooks (upside down).
  19. Trim the burlap on the bottom edge so there’s 1 inch beyond the plywood, as above. Staple as above, folding the corners like you would wrap a gift. This will be the most visible part of the panel, so work as neatly as possible on this seam. Tap the staples in with a hammer. You may want to use one of the big “heavy duty metal staples” at the two ends (hammered in) because the fabric folds get pretty thick there and can pull regular staples out.
  20. Pick the panel up and rest it on the bottom edge that you just stapled.
  21. Staple the burlap to the top edge as above. You’ll need to cut two slits for the the two hooks to poke through.
  22. Rejoice.

Treat the baffles with fire retardant

The fiberglass panels are basically OK as far as your local fire code goes — look for information about that on the side of the bale of the fiberglass panels. Same goes for the polyester batting, and perhaps even the burlap. But to be safe, you should apply some retardant. I have used Inspecta-Shield, which costs about $25 per 1-quart bottle, and covers about 10 panels.

Vacuum each panel first (to get rid of loose lint) and trim off any loose strings. Then simply spray the liquid on using a spray bottle.


Glue loose burlap

You may want to glue down some of the looser flaps of burlap. In particular, if you are hanging these overhead, they look a lot better if the short diagonal folds of burlap at the corners are creased and glued down. Heavy fabric glue seems to work great for this — I used “Super Thick Tacky Glue” — it’s like white Elmer’s glue just thicker. Any fabric store will carry it. Doing this step really improves the look of the panels.


Hang the baffle

There are three proposed ways to hang each baffle. All three ways have the same four hooks installed on the baffle edge (2 hooks) and on the overhead joists (2 hooks). The baffle hooks are not installed using standard threaded-shank screw hooks — instead, special “side-bolting” hooks are used. This is much more secure — the threaded hooks are likely to eventually pull out of the plywood edge.

The three ways to hang it:

  1. Hang it right up against the joists, hook to hook.
    • Cost: zero
    • Pros: cost, no swinging
    • Cons: up too high, no height control
  2. Hang it displaced down from the joists using chain.
    • Cost: about $2.00
    • Pros: height adjustment is easy; ready to use, no labor required
    • Cons: some cost; possible swinging; visually distracting
  3. Hang it displaced down from the joists using aircraft cable.
    • Cost: about $5.00
    • Pros: visually subtle; clean lines
    • Cons: height adjustment is impossible (need new cable/clamp); cable links are labor intensive to build; high cost; possible swinging

Note that while an extra $3.00 for the aircraft cable solution sounds reasonable, multiply that times 30 panels and you just spent an extra $100. Plus the labor required gets very big when building 60 of them.

The main problem with the chain is that it draws the eye, and you usually want these panels to NOT be noticed. There is black “decor” chain, but it is flimsy and designed for cosmetic/decorative use only. I strongly recommend you use “real” chain, because these will be hanging over peoples’ heads.

One cheap option would be to simply paint the chains white (or black, or whatever you want). In fact, that’s what I ended up doing, and it looks great. Simply dunk each 24-inch length of chain into a can of black paint and hang it vertically to dry. Catch the drippings back into the can for the first two minutes or so. The paint I used was Ace Hardware Indoor/Outdoor Rust Stop — Flat Black (need about 0.4 ounces per chain) and it looked great, certainly from a distance.

More hooks and chains can be used if you want it to be even more secure, or to inhibit swinging. Swinging could also be inhibited by very small string (e.g. fishing line) run from the bottom of the chain to a point away from the panel and under slight tension.

2005 Atlanta Film Festival

I’ve been going to the Atlanta Film Festival since the early 90’s, and for the last 5 years or so I’ve been taking that whole week off work and going to every screening that appeals to me. This year was no different … well, no, it was different this year, because I wasn’t able to take the week off from work — too much going on. I still got to see about the same number of screenings though.

So, since I’ll forget if I don’t externalize, here’s the results, in order from best to worst:

Best of the festival

Rize ( AFF desc / website ) — absolutely incredible; saw it twice

Unknown White Male ( AFF desc / website ) — awesome; if you forgot your identity, after you’d restarted your life with a new identity would you still care about getting your old memories back?

Seoul Train ( AFF desc / website ) — documentary about the underground railroad (think human smuggling) trying to get people out of North Korea; bracing, searing, fantastic insight into the horrors of those trying to escape and those who try to help them do it

La Sierra ( AFF desc / website ) — about the teenagers and young men from the slums who make up part of the Colombian conflict; I have to say it was pretty great, because 3 months later it still sticks with me. I saw City of God on DVD recently (including the 1 hour documentary News From A Personal War)and it recalls the same sort of lawless chaos — actually, not lawlessness, really, more like brutal ghetto law.

Interesting

Fall of Fujimori ( AFF desc / IMDB ) — a very strange documentary, smacked of pro-Fujimori propaganda; I’d love to hear the back story.

Boys of Baraka ( AFF desc / website ) — threatened to be feel good crap (hey, it won the audience award, whaddya expect) but was actually alllllright

Twist Of Faith ( AFF desc / website ) — sexual abuse at the hands of pedophile priest; full grown men grapple with confronting the events of their youth; insightful view into how people try to stand up for what’s right, and fail

Take it or leave it

Documentary shorts ( AFF desc ) — not horrible

Education of Shelby Lynn (documentary) ( AFF desc / website )– standard POV fare

Kill Your Idols ( AFF desc / IMDB ) — yet another fawning treatment of the New York nowave/underground scene; surprisingly dull

Liberace of Baghdad ( AFF desc / website ) — vaguely interesting insights into the life of average folks in post Freedom-On-The-March Baghdad; wanted to like it but it was weak and went nowhere; maybe that’s the point.

Please kill me

Hooligans ( AFF desc / IMDB ) — why? why do I keep going to these crappy narrative pics? They are always complete shit, especially the ones with some B-list actor in it (Paul Reiser, Elijah Wood, whatever). And of course it was preceded by some local huckster on stage hyping the shit out of it. So bad I left early. No wait, I actually forced myself to sit through the whole thing, waiting for it to redeem itself, and bolted as soon as the credits started. Elijah Wood fans will love it, I’m sure. Well, at last it wasn’t as bad as the 2004 festival’s The Last Goodbye, which taught me to never EVER attend screenings of locally produced films, and be gunshy about narratives in general. See, the problem is that occasionally there is a good narrative — I loved 2004’s Primer. You gotta play to win …

“weird” narrative shorts collection ( AFF desc ) — crap crap CRAP

Emmanuel’s Gift ( AFF desc / website ) — you know, I can’t believe they actually let this drivel into the festival; I mean, I know that they tend to save the schmaltziest, most geriatric fundraising fluff for the Wednesday Carter Center screening, but this is ridiculous. I guess word got out though, because there were fewer people there than I’ve ever seen at an AFVF/AFF Carter Center screening. Alas, I went and suffered through the whooooole thing (“it’s just a little saccharine, it’s still good, it’s still good!”)

Honorable mention for movies I planned to see but couldn’t; thanks IMAGE!

William Eggleston in the Real World ( AFF desc ) — even if IMAGE could have projected it properly, I still suspect it would have been mindnumbingly dull; not all subjects work on the big screen, folks.

MANA: Beyond Belief ( AFF desc / website ) — Damn it I wanted to see this, and damn it if IMAGE seems to have entirely forgotten how to run their own film festival!

The Beat That My Heart Skipped ( AFF desc / website ) — ditto; sign on the door when I arrived to see it. At previous festivals, IMAGE knew how to get the word out about schedule changes; that’s a skill that they no longer have.

In total, a noticeable step back from recent years. Hopefully IMAGE can recover.

The Hawk Channel

Dsc00851At the rear of the corporate campus where I work, we have a 250-foot-tall radio tower located among a field of large satellite antennas. About halfway up the tower is a platform that has for years been home to a nest for a couple of red-tailed hawks. They usually produce 1-3 new baby hawks every spring.

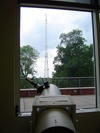
In mid April we observed the mother hawk staying on the nest pretty much 24-7, and by April 24th we had the first sighting of a hatchling. After confirming that the hatchling existed, I brought my telescope into work and set it up on a high floor of an adjacent building where we had a decent view of the nest (I built an 8-inch Dobsonian telescope several years ago from scratch — it took me a month of weekends). People were able to come by any time to take a look. I didn’t man it the whole time — I just left it there for people to look through.

Dsc00850We have a campus-wide cable television system that feeds our own TV networks (plus a few not ours like Comedy Central and the Weather Channel) to all offices so they can see anything that’s airing at any time for whatever reason. I know the engineer who runs that system, and we managed to get my telescope fed into the cable system. I have a small video camera that hooks up to the telescope focuser (where the eyepiece normally goes) — it was a gift from my Dad about a year ago.

So now everyone on campus could tune their office TV to channel 75 and watch the Hawk Channel. From what I heard, folks were glued to it. I singlehandedly destroyed campus productivity for the month of May.

Dsc00845 We watched the hatchling grow from barely peeking over the edge of the [big, deep] nest, to being just as big as the adults, albeit with adolescent plumage. The mother hawk brought it kills (rats, pigeons, mmmm!) and the baby devoured them. It’s quite the gruesome sight, although I don’t think I ever laughed as hard as I did watching that baby gulp down the last big serving of rat.

About 6 weeks after we first spotted the hatchling, the now full-grown hawk disappeared from the nest. We saw it a few days later at the very top of the tower, and since then have seen it down nearer the ground, apparently learning to hunt, being bombarded by mockingbirds.